Hola!!
Feliz Halloween a quienes lo celebran, aquí en México no lo celebramos pero eso no quiere decir que no pueda hacerme una manicura!! :D
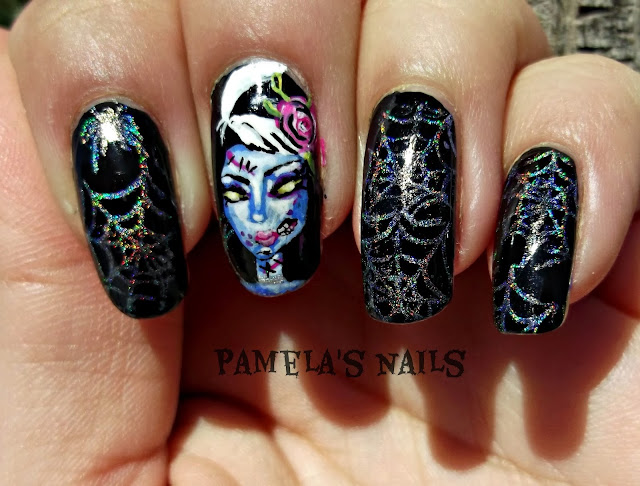
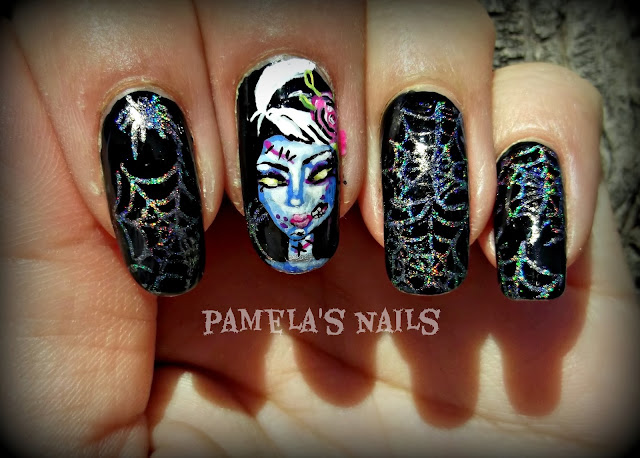
Vi una imagen que me encanto para pintarla, hace mucho que no me inspiraba para pintar pero ya por fin me volvió la inspiración jeje, es una chica zombie azul muy coqueta y sexy, la pinte a mano libre con pinturas acrílicas.
En las otras uñas use la placa para estampar de Bunny nails HD-C para estampar las telarañas con el esmalte holografico de Color Club ''Angel kiss'' el cual es excelente!! me sorprendió lo hermoso que es y lo bien que funciona para el stamping. Por último aplique top coat de marca Avon y listo!
Me encantaron la forma en que se ven las telaranas holograficas en la base negra!!
Espero que les guste!!!!
Kamis, 31 Oktober 2013
Rabu, 30 Oktober 2013
Try It On Tuesday - Late Edition (Technical Difficulties!)
Press Sample
*Product(s) Featured provided for review via giveaway. Please see Disclaimer/Legal Page for more information**
Hello Lovelies! Please excuse my random disappearance - Somehow my keyboard on my Macbook was given a drink of water while I wasn't looking and I was sans keyboard for a bit there. The external USB keyboard that I usually use was also doused, and is still out of commission, but the tiny macbook keyboard is working again, which is better than nothing. At least I am able to post.
In other news, I had a flare up of the evil lungs over the weekend (if you follow me on Instagram (@KimbersKorner) you already know how thrilled I was to be denied care by my Pulmonologist since I am currently in between health insurance coverage. On top of that, Monday afternoon I arrived at a long time client's house for the final day of her pet sit, to find that one of her dogs had passed away overnight. Thankfully being a vet tech for 8 years has steeled me for the death of furry friends, yet this one hit me incredibly hard. It appears that he was either bit or stung (he had a history of severe anaphalactic reactions) and in the hours between visits he passed. Calling his owner was one of the hardest things I have ever done. Thankfully she is a wonderful person and knows how high our standard of care is so she doesn't blame us, however I still feel responsible. Chances are that without an EpiPen, even had I been there I would not have been able to save him, but the what ifs will always be there. What's worse, is that my bond with this dog was deep, and I feel his loss very deeply.
See? 2013 is the worst year ever for me, and just keeps getting worse. I can't wait to see it roll away.
But let's talk about happy things, shall we?
Today I have an awesome polish from Mint Polish to share. I've been wanting to try out Mint Polish for good while, and was lucky enough to win a giveaway on Instagram. The shade I won is called Full Bodied, and is a gorgeous Oxblood Jelly. I fell in love with this shade the moment I saw her on Instagram, and a few days later, entered the giveaway to win her. I was shocked that I won, but oh so thrilled. Not only did winning allow me to try a brand that I've been dying to check out, but I won the vampy polish of my dreams! A huge thank you to Mint Polish!
You'll also notice the return of my left hand! It's back to swatch shape again, so I'm sure you'll be seeing it from time to time. I prefer to photograph my right hand, but since I *am* right handed, sometimes the left hand is just easier.
This is 3 coats of the fabulous Full Bodied topped with HK Girl Top Coat:
Rawr! I dare you to tell me that this is not the sexiest oxblood jelly ever! I'll be honest, I rarely love a color enough to wear it without glitter or nail art, but I've been wearing this for 3 days now, all on her lonesome. So much love for this polish!
Full Bodied's formula is just as impressive as its color, with a thick yet fluid consistency that doesn't thicken up during use. Application was so easy that this polish may as well have applied itself - no dragging, balding, or streaking - which is always a huge bonus with such a dark jelly polish. Full Bodied is opaque at 2 coats, although I used 3 since my photo lighting is very strong and tends to make Jellies look much sheerer than they truly are. Dry time was fast, and Full Bodied is incredibly shiny, even without top coat. I, being the impatient creature that I am, did use my beloved HK Girl Top Coat though, which made this girl even shinier. Wear is simply amazing - I'm on day 3 of wearing this beauty and I have zero tip wear or chips, the shine is still just as dazzling and the color just as rich and vibrant.
I love this polish so very much, loves. I simply must try more from Mint Polish (this is why I need to win the lottery - my budget is a cruel, cruel mistress.)! With a formula this fabulous, amazing application and incredible wear, I just have to have more. And the colors! Mint Polish makes some seriously dazzling colors!
You can check out Mint Polish at MintPolish.com. All polishes are 5-free and retail for $12 per 15ml bottle. I have my eye on Original Mint, Czarina, Rue Cler, Ming, and Peligroso (Oh you have to see Peligroso!). I'm also dying to check out their Wet Look Sealer and Flawless Base Coat.You can also follow Mint Polish on Facebook and Instagram for new releases, sales info, and swatches. You can also check out their blog here.
What do you think of Full Bodied? Are you a fan of vampy jellies?
I'll be back tomorrow with this week's Mish Mash challenge mani (I'm a full day late sorry all!), and I have some new Polish TBH coming up as well as Flakie Friday (an awesome Lac Attack beauty that you just have to see!), and more from Squishy Face Polish, Love Angeline, and more.
Thanks for stopping by and Happy Polishing!
-Kimber
*Product(s) Featured provided for review via giveaway. Please see Disclaimer/Legal Page for more information**
Press Sample
Label:
faves,
Full Bodied,
jelly,
Mint Polish,
new,
Oxblood,
red,
review,
swatch,
swatches,
TIOT,
Try It On Tuesday,
Vampy
Halloween Stamping With Bunny Nails Plates
Hola!!
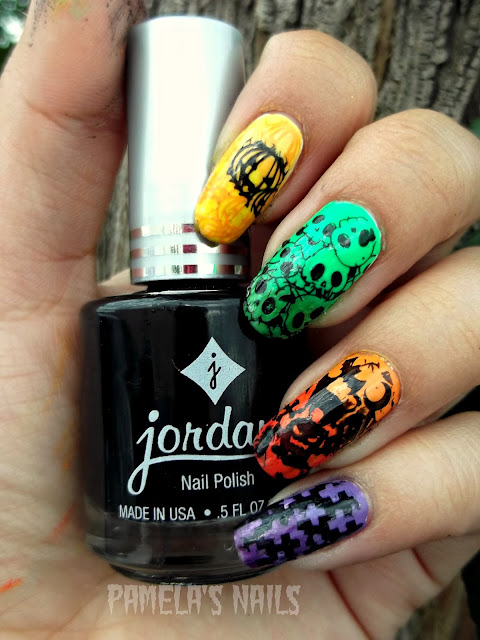
Espero estén muy bien!, hoy les tengo dos placas para estampar de Bunny Nails!! Dulce fue muy amable en enviarme la placa HD-D y HD-C, Gracias Dulce!
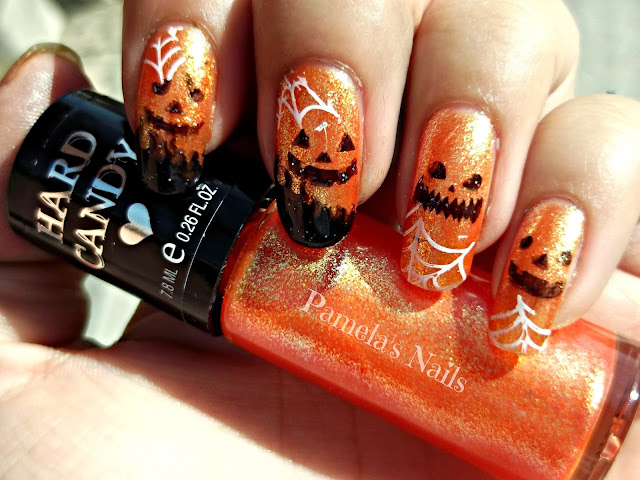
Las 2 placas contienen imagenes con motivos de halloween y Día de muertos! a mi me han encantado no he sabido ni por donde empezar por que tienen muchisima variedad, en el final del post les muestro imagenes de las 2 placas:
Quise hacer varios diseños simples para mostrarles la variedad y versatilidad de las placas, funcionan muy bien son de excelente calidad, cada una tienen un valor de $ 16.99 dlls. Y en verdad lo valen
Contienen imagenes grandes y pequeñas para diferente tipo de uña, esta vez yo no tuve problema para estampar mis uñas que son un poco anchas ya que las imagenes para estampar en toda la uña son bastante grandes aprox. de 2x2.5 cm. :D
En otro post les mostrare las imagenes de día de muertos!! con calaveras de azúcar y el típico ''papel picado'' que se utiliza en los altares de muertos aquí en México!

Espero que les gusten los diseños pueden comprar estas placas y muchas mas en http://bunnynails.ecrater.com/p/18807798/hd-c-nail-art-stamp-plate
y para contactar a Dulce de Bunny Nails https://www.facebook.com/bunny.nails
Selasa, 29 Oktober 2013
Alice in Wonderland
This look has actually been in my head for a very long time, ever since I did my Nightmare Before Christmas look, but after seeing the Alice in Wonderland look by Luciferismydad it was impossible not to take inspiration from that one as well.
Cheshire cat is supposed to be in a misty cloud, I don't know if you can tell...

What do you think, should I do more movie themed makeup looks like this one? :)
Thank you for reading!

Cheshire cat is supposed to be in a misty cloud, I don't know if you can tell...

Face
*Skin Base Foundation 02 (Illamasqua)
*Studio Finish Concealer NC15 (MAC)
Eyebrows
*Corrupt (Makeup Geek)
*Eye Booster Ultra-black (Physicians Formula)
Eyes
*Love+ (Sugarpill)
*Acidberry (Sugarpill)
*Goldilux (Sugarpill)
*Anja (Illamasqua)
*Corrupt (Makeup Geek)
*Liquid Last Liner Aqualine (MAC)
*Eye Booster Ultra-black (Physicians Formula)
*Precicion ink Scribe (Illamasqua)
*Eyeliner Orchidaceous (Lime Crime)
*Extended Play Gigablack Lash Mascara (MAC)
*Contacts by Photoshop
-------------------------------------------------------------------------------
What do you think, should I do more movie themed makeup looks like this one? :)
Thank you for reading!

Senin, 28 Oktober 2013
Madam Noire on Instagram
Finally! --> http://instagram.com/madamnoire
I have finally joined Instagram where you will be able to see my everyday makeup looks and stuff that I don't really want to write an entire blogpost about but that you might find interesting anyway. So go in and follow me if you'd like to see more of my makeup addiction (and probably some Ester the papillon pics as well...). :)

I have finally joined Instagram where you will be able to see my everyday makeup looks and stuff that I don't really want to write an entire blogpost about but that you might find interesting anyway. So go in and follow me if you'd like to see more of my makeup addiction (and probably some Ester the papillon pics as well...). :)

Minggu, 27 Oktober 2013
The Penguin Makeup Challenge Part 2: Black and a Color
Since Halloween is closing in on us I thought I'd combine black with the holiday's own special color, orange. :) Yeah, yeah I realize that some of you might be sick of my striped looks but personally I can't get enough of them so I will torture you with another one. ;)
Links to the other girls Penguin makeup looks:
Confusionbay
ComaHeart
Stargirlphoto
They've all made wonderful contributions to this challenge so go check them out! :)
I apologize for the strange colors on the tutorial pictures. It was not until I had finished the whole look I realized that my camera was set on a too high saturation value, which doesn't show on the thumbnails on the camera screen. :( The finished look however has got the correct colors!
Step 1. I've already taken some steps ahead (before I got the idea to make this into a tutorial) and primed my eyes. Then, apply NYX Jumbo Pencil in Milk all over the lid, concentrating the color at the lower parts. After that, draw on the black stripes with a regular eye pencil. Don't worry too much about blending but gently pat the stripes with a finger to make them somewhat even.
Step 2. Fill in the white stripes with a bright orange eyeshadow. I used a mixture of Flamepoint and Buttercupcake by Sugarpill, since Flamepoint alone is too dark for this purpose.
Step 3. Apply the blackest black eyeshadow you own on top of the black stripes and then carefully diffuse the edges between the stripes. You don't want to blend them in too much, just create a softer transition from black to orange and vice versa.
Step 4. Clean up the edge of the eyeshadow with concealer. Then fill in the brow with orange and black eyeshadow, creating a gradient look.
Step 5. With a sharp angled brush (such as MAC #266) draw a "line" underneath the lower lash line. It's hard to explain this in words so just look at the picture and try to do something similar, ok? If you have any problems you're always welcome to ask. :) Also, extend the inner corner stripe into a little point.
Step 6. Line the upper lash line with a black liquid eyeliner. Make the line very, very thin!
Step 7. Above the black liner, place a line of orange.
Step 8. I wanted to give my eyeliner a more cartoonish look so I drew another black line above the orange one. Then I applied mascara and false eyelashes to my top lashes.
Also, whiten the waterline with a white eyeliner pencil.
Step 9. Apply the same orange eyeshadow as we used before on the waterline and finish off the look by painting your lower lashes with the orange liquid eyeliner. When cleaning up the mess I made under my lash line I accidentally applied a little too much black, which honestly looked great with this look, so feel free to take the black further down in step 5.

Face
*Skin Base Foundation 02 (Illamasqua)
*Studio Finish Concealer NC15 (MAC)
Eyebrows
*Flamepoint (Sugarpill)
*Buttercupcake (Sugarpill)
*Corrupt (Makeup Geek)
Eyes
*Jumbo pencil Milk (NYX)
*Medium Pencil Sophie (Illamasqua)
*Flamepoint (Sugarpill)
*Buttercupcake (Sugarpill)
*Corrupt (Makeup Geek)
*Blanc Type (MAC)
*Eye Booster Ultra-black (Physicians Formula)
*Eyeliner 6th element (Lime Crime)
*False eyelashes #41 (Red Cherry)
-------------------------------------------------------------------------------
Now tell me about you Halloween looks! What are you all going to dress up as? :)
Thanks for reading and hope you'll have a lovely day!

Langganan:
Postingan (Atom)


